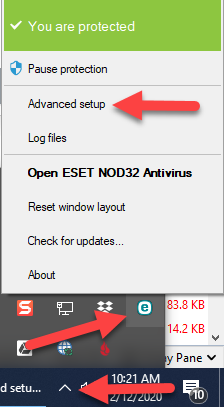
If you are having difficulty with Thunderbird not downloading Gmail emails with the screen just displaying the status message “Connected to imap.gmail.com” – and if you also use ESET Nod32 antivirus – then it is likely that it is Nod32 that is the issue, not Thunderbird or Gmail. Here’s how to fix it: 1. In … [Read More »]
Dark Chocolate Taste Test

Today (7th July) was apparently World Chocolate Day (not to be confused with International Chocolate Day which is an American thing in September I think). To celebrate, I thought I would post a bit of research data my wife and I did over the past few weeks. I bought 15 different types of dark chocolate and … [Read More »]
How to extend the range of your home WiFi network
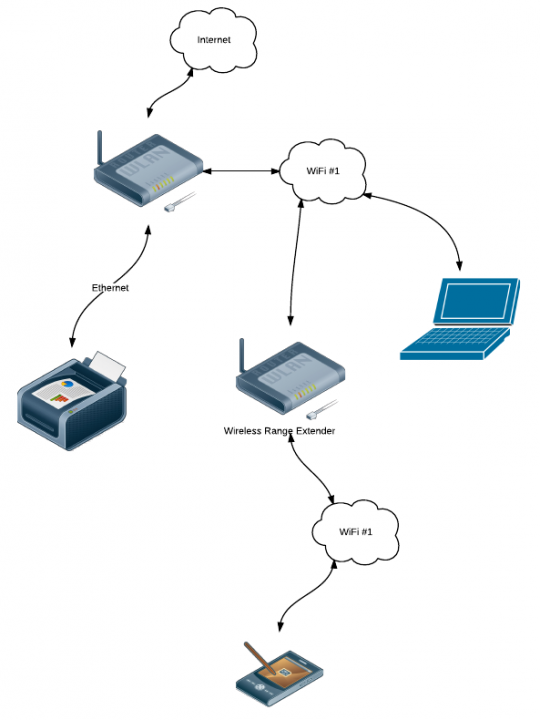
There are several approaches for increasing the range of your home’s WiFi network. Two basic options are: use a Wireless Access Point to add additional wireless coverage to your network use a Wireless Range Extender to increase the coverage of your WiFi They achieve largely the same result, but via two very different methods, and … [Read More »]
Poor quality MP4 output from PowerDirector
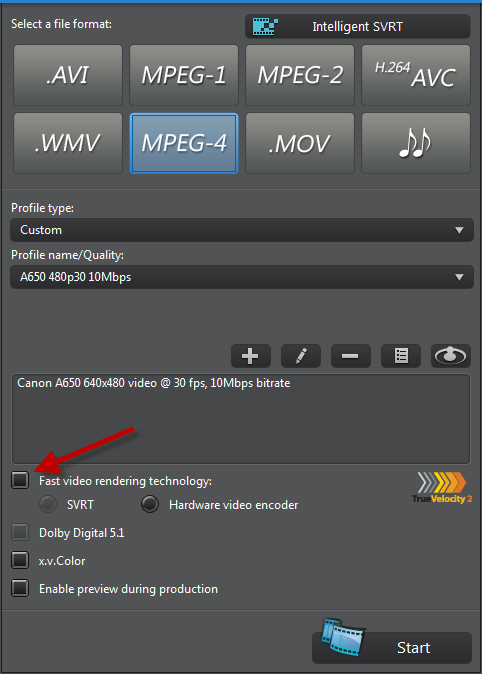
I finally worked out what was causing the poor quality MP4 video output from PowerDirector 10 – even at very high bitrates. Turns out that the hardware video encoder in my ThinkPad T510 really doesn’t do MP4 very well. I did discover that for certain source video formats (especially the AVCHD videos from my Sony … [Read More »]
Where did the sun go?
I spend my nights with the quilt on, Trying to keep warm. Summer should be here right now, But it’s not been at all. It’s supposed to be, Hot and sunny every day. We should be at the beach, Or sweating, or sweating, in the shade. Where did the sun go? Did you put it … [Read More »]
- 1
- 2
- 3
- …
- 164
- Next Page »